just is just amazing

2025-07-04

Just is an alternative to make. It allows you to make files that look like this:

# Show current directory tree
tree depth="3":
    find . -maxdepth {{depth}} -print | sed -e 's;[^/]*/;|____;g;s;____|;  |;g'

# Quick HTTP server on port 8000
serve port="8000":
    python3 -m http.server {{port}}

And from here you would be able to run just tree to run the commands under it just like make. However, notice how easy it is to add arguments here? That means you can do just serve 8080 too! That's already a killer feature but there's a bunch more to like.

global alias

The real killer feature, for me, is the -g flag. That allows me refer to a central just file, which contains all of my common utils. From there, I can also add this alias to my .zshrc file.

# Global Just utilities alias
alias kmd='just -g'

This is amazing because it allows you to have one global just-file with all the utilities that I like to re-use across projects. So if there are commands that you would love to reuse, you now have a convenient place to put it.

Especially with tools like uv for Python that let you inline all the dependencies, you can really move a lot of utils in. Not only that, you can also store this just-file with all your scrips and put it on Github.

working directories

There are more fancy features to help this pattern.

I have this command to start a web server that contains my blogging editor. Normally I would have to cd into the right folder and then call make write but now I can just add this to my global justfile via the working-directory feature.

# Deploy the blog
[working-directory: '/Users/vincentwarmerdam/Development/blog']
blog-deploy:
    make deploy

This lets me combine make commands that live on a project that I use a lot with a global file so that I can also run commands when I am not in the project folder.

From now on I can just type kmd write and kmd deploy to write from my blog and then to deploy it.

docs

It's also pretty fun to have an LLM add some fancy bash-fu.

# Extract various archive formats
extract file:
    #!/usr/bin/env bash
    if [ -f "{{file}}" ]; then
        case "{{file}}" in
            *.tar.bz2) tar xjf "{{file}}" ;;
            *.tar.gz)  tar xzf "{{file}}" ;;
            *.tar.xz)  tar xJf "{{file}}" ;;
            *.tar)     tar xf "{{file}}" ;;
            *.zip)     unzip "{{file}}" ;;
            *.gz)      gunzip "{{file}}" ;;
            *.bz2)     bunzip2 "{{file}}" ;;
            *.rar)     unrar x "{{file}}" ;;
            *.7z)      7z x "{{file}}" ;;
            *)         echo "Don't know how to extract {{file}}" ;;
        esac
    else
        echo "{{file}} is not a valid file"
    fi

# Kill process by port
killport port:
    lsof -ti:{{port}} | xargs kill -9

Notice how each command has some comments on top? Those are visible from the command line too! That means you'll also have inline documentation.

> just -g 
Available recipes:
    extract file            # Extract various archive formats
    killport port           # Kill process by port

chains

You can also chain commands together, just like in make, but there is a twist.

# Stuff
stuff: clean
    @echo "stuff"

# Clean
clean:
    @echo "clean"

If you were to run just stuff it would also run clean but you can also do this inline. So if you had this file:

# Stuff
stuff:
    @echo "stuff"

# Clean
clean:
    @echo "clean"

Then you could also do this:

just clean stuff 

Each command will only run once so you can't get multiple runs via: just clean clean clean but you can specify if some commands need to run before/after.

a:
  echo 'A!'

b: a && c d
  echo 'B!'

c:
  echo 'C!'

d:
  echo 'D!'

Running just b will show:

echo 'A!'
A!
echo 'B!'
B!
echo 'C!'
C!
echo 'D!'
D!

You can also choose to run just recusrively by calling just within a defition so expect a lot of freedom here.

just scratching the surface

just feels like one of those rare moments where you're exposed to a new tool and within half an hour you are already more productive.

I'm really only scratching the surface with what you can do with this tool, so make sure you check the documentation.
Giving daytona.io a spin

2025-07-03

Daytona is a cloud provider that seems to aim itself at the sandbox use-case. LLMs generate code that we can't always trust, so we'd like to run it in an environment that's safe and isolated. The whole point is to be able to run code that prints out the result that you're interested in. This is different from what modal because they will return full Python objects back.

First demo

The setup is straightforward, you grab an API key and you're able to run scripts like this:

import os
from daytona import Daytona, DaytonaConfig
from dotenv import load_dotenv


load_dotenv(".env")
# Define the configuration
config = DaytonaConfig(api_key=os.getenv("DAYTONA_API_KEY"))

# Initialize the Daytona client
daytona = Daytona(config)

# Create the Sandbox instance
sandbox = daytona.create()

# Run the code securely inside the Sandbox
response = sandbox.process.code_run('''
print("Hello World from code!")
''')
if response.exit_code != 0:
  print(f"Error: {response.exit_code} {response.result}")
else:
    print(response.result)

Custom environment

Daytona comes with a sensible default environment but you can also make your own.

# Define the dynamic image
dynamic_image = (
    Image.debian_slim("3.12")
    .pip_install(["pytest", "pytest-cov", "mypy", "ruff", "black", "gunicorn"])
    .run_commands("apt-get update && apt-get install -y git curl", "mkdir -p /home/daytona/project")
    .workdir("/home/daytona/project")
    .env({"ENV_VAR": "My Environment Variable"})
    .add_local_file("file_example.txt", "/home/daytona/project/file_example.txt")
)

# Resources to attach
resources = Resources(
    cpu=2,  # 2 CPU cores
    memory=4,  # 4GB RAM
    disk=8,  # 8GB disk space
)

# Create a new sandbox environment with the specs you want
sandbox = daytona.create(
    CreateSandboxFromImageParams(
        image=dynamic_image,
    ),
    timeout=0,
    resources=resources,
    on_snapshot_create_logs=print,
)

You are also able to use a Docker registry for your sandboxes if you prefer to define your dependencies that way.

More Features

The code looks and feels pretty similar to modal, but there are a few interesting differences. For starters, it seems that TypeScript is actually a first class citizen here, here, which makes a lot of sense since a lot of LLM apps are written in TypeScript. It certainly feels like a nice pattern to be able to call all something like Daytona from TypeScript, but still have access to all the tools in Python in a sandbox environment. I can definitely see that being useful.

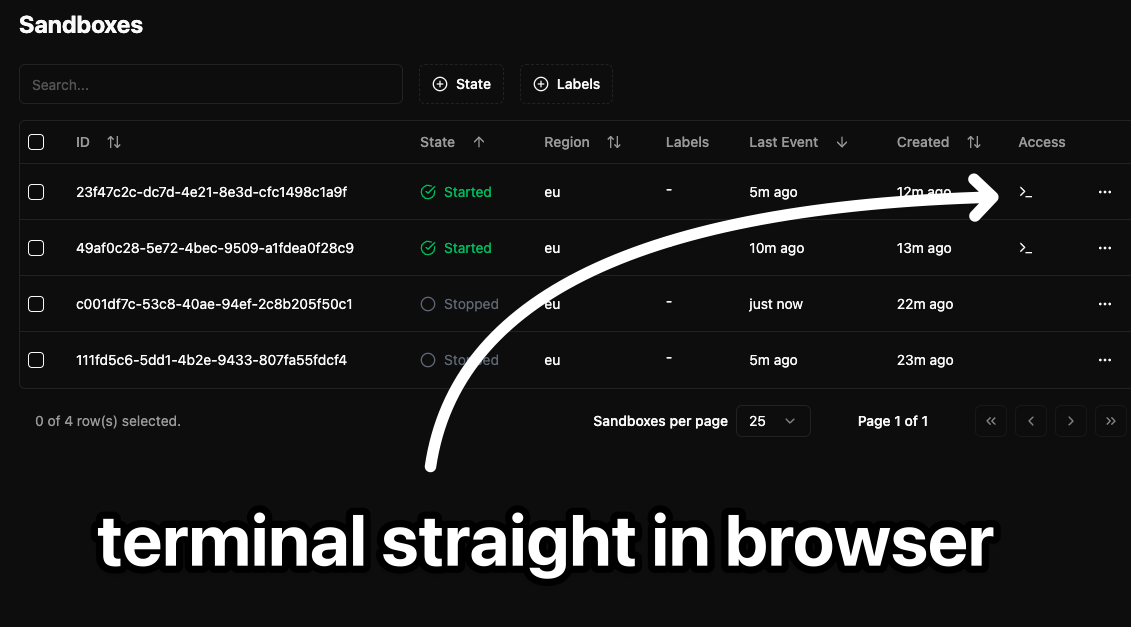
I did spot another thing that seemed pretty nice, which is that you also have access to a terminal.

Uploaded image
One click and you're in.

Other features include git operations, adding volumes, bash commmands, log streaming and the ability to preview via urls. That last feature felt like a stellar one to try.

import os
from daytona import Daytona, DaytonaConfig
from dotenv import load_dotenv

load_dotenv(".env")
config = DaytonaConfig(api_key=os.getenv("DAYTONA_API_KEY"))
daytona = Daytona(config)

# Create the Sandbox instance, with public access
sandbox = daytona.create()
sandbox.public = True
preview_info = sandbox.get_preview_link(8000)
print(f"Preview link url: {preview_info.url}")
print(f"Preview link token: {preview_info.token}")

# Make a simple site to host
response = sandbox.process.exec("echo 'Hello World from a sandbox!' > index.html")

# Running that server
response = sandbox.process.exec("python -m http.server 8000", timeout=5)

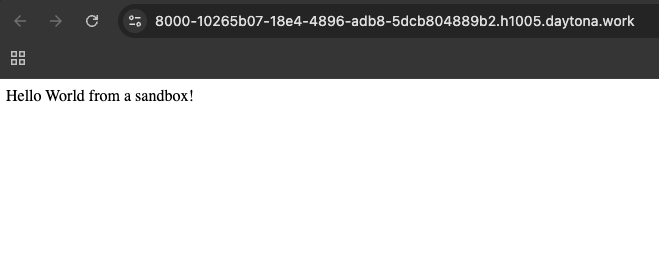
This spins up a web server and also gives you a URL. Here's what mine looked like.

Uploaded image
It works!

This final feature feels particularly interesting because you could now have an LLM generate code inside of a sandbox, started up as a web server in the same secure sandbox and you would still be able to inspect it. Something about that feels like it might have legs to it.

uvx pattern for two tiers of open work

2025-06-30

There are two tiers of open-source projects for me now.

Historically whenever I felt that tools might be useful to me I naturally assumed they might be useful to other people, so taking the effort of putting it up on pypi made sense. Nowadays though, I am making more and more personal tools. It is all thanks to Claude and It has made me rethink the distribution of my work. Some tools are really meant for "just me" which makes pypi a bad target. Users might expect a proper amount of maintenance when you claim a name there because you're squatting a name that someone might want to use.

Fix for the second trier

If all you're building is a CLI it turns out that a Github repository is really all you need thanks to a nice uvx pattern. For example, this cli that contains my custom blog writing tool can run with this one-liner:

uvx --with git+https://github.com/koaning/draft draft --help

It takes care of all the dependencies and I don't have to worry about package versions of distributions. Feels like the best way for me to share open-source work that doesn't really fall in the "first tier" of open-work category. It is still open, but it suggests much lower expectations and does a lot better job at explaining that I am the primary target audience.

Pun on README

This pattern has also led me to add a small joke on some repos.

pasted_image_1751013425843
You're not really installing it, right?

I would encourage more people to do this. Partially to preserve the namespace on pypi but also because I would love it if more people would share their brainfarts with the world.